
How do I stream with multiple presenters in OBS?
You can bring multiple remote presenters into OBS by using Microsoft Teams with NDI®. Each presenter can appear as an individual video source in OBS, allowing you to create custom layouts with presenters, slides, screen shares, and other content.
Important: Skype is no longer available. These instructions use Microsoft Teams instead.
Before you start
You will need:
- OBS Studio installed on your Windows or Mac computer.
- DistroAV, the current NDI plugin for OBS. DistroAV was formerly called OBS-NDI.
- A Microsoft Teams account that supports NDI broadcast production.
- A Teams administrator who can enable the Broadcast production with NDI and SDI hardware policy.
- All presenters connected to the Teams meeting.
- Headphones for each presenter, whenever possible, to prevent echo.
For the latest installation instructions, see the DistroAV NDI setup guide.
Step 1: Enable NDI for your Teams account
Your Teams administrator must first enable NDI for your account.
In the Teams admin center:
- Go to Meetings > Meeting policies.
- Select the policy assigned to the user who will produce the webinar.
- Open the Audio & video section.
- Turn on Broadcast production with NDI and SDI hardware.
- Select Save.
For more information, see Microsoft's guide to allowing broadcast production in Teams meetings.
Step 2: Turn on production tools in Microsoft Teams
After the policy has been enabled:
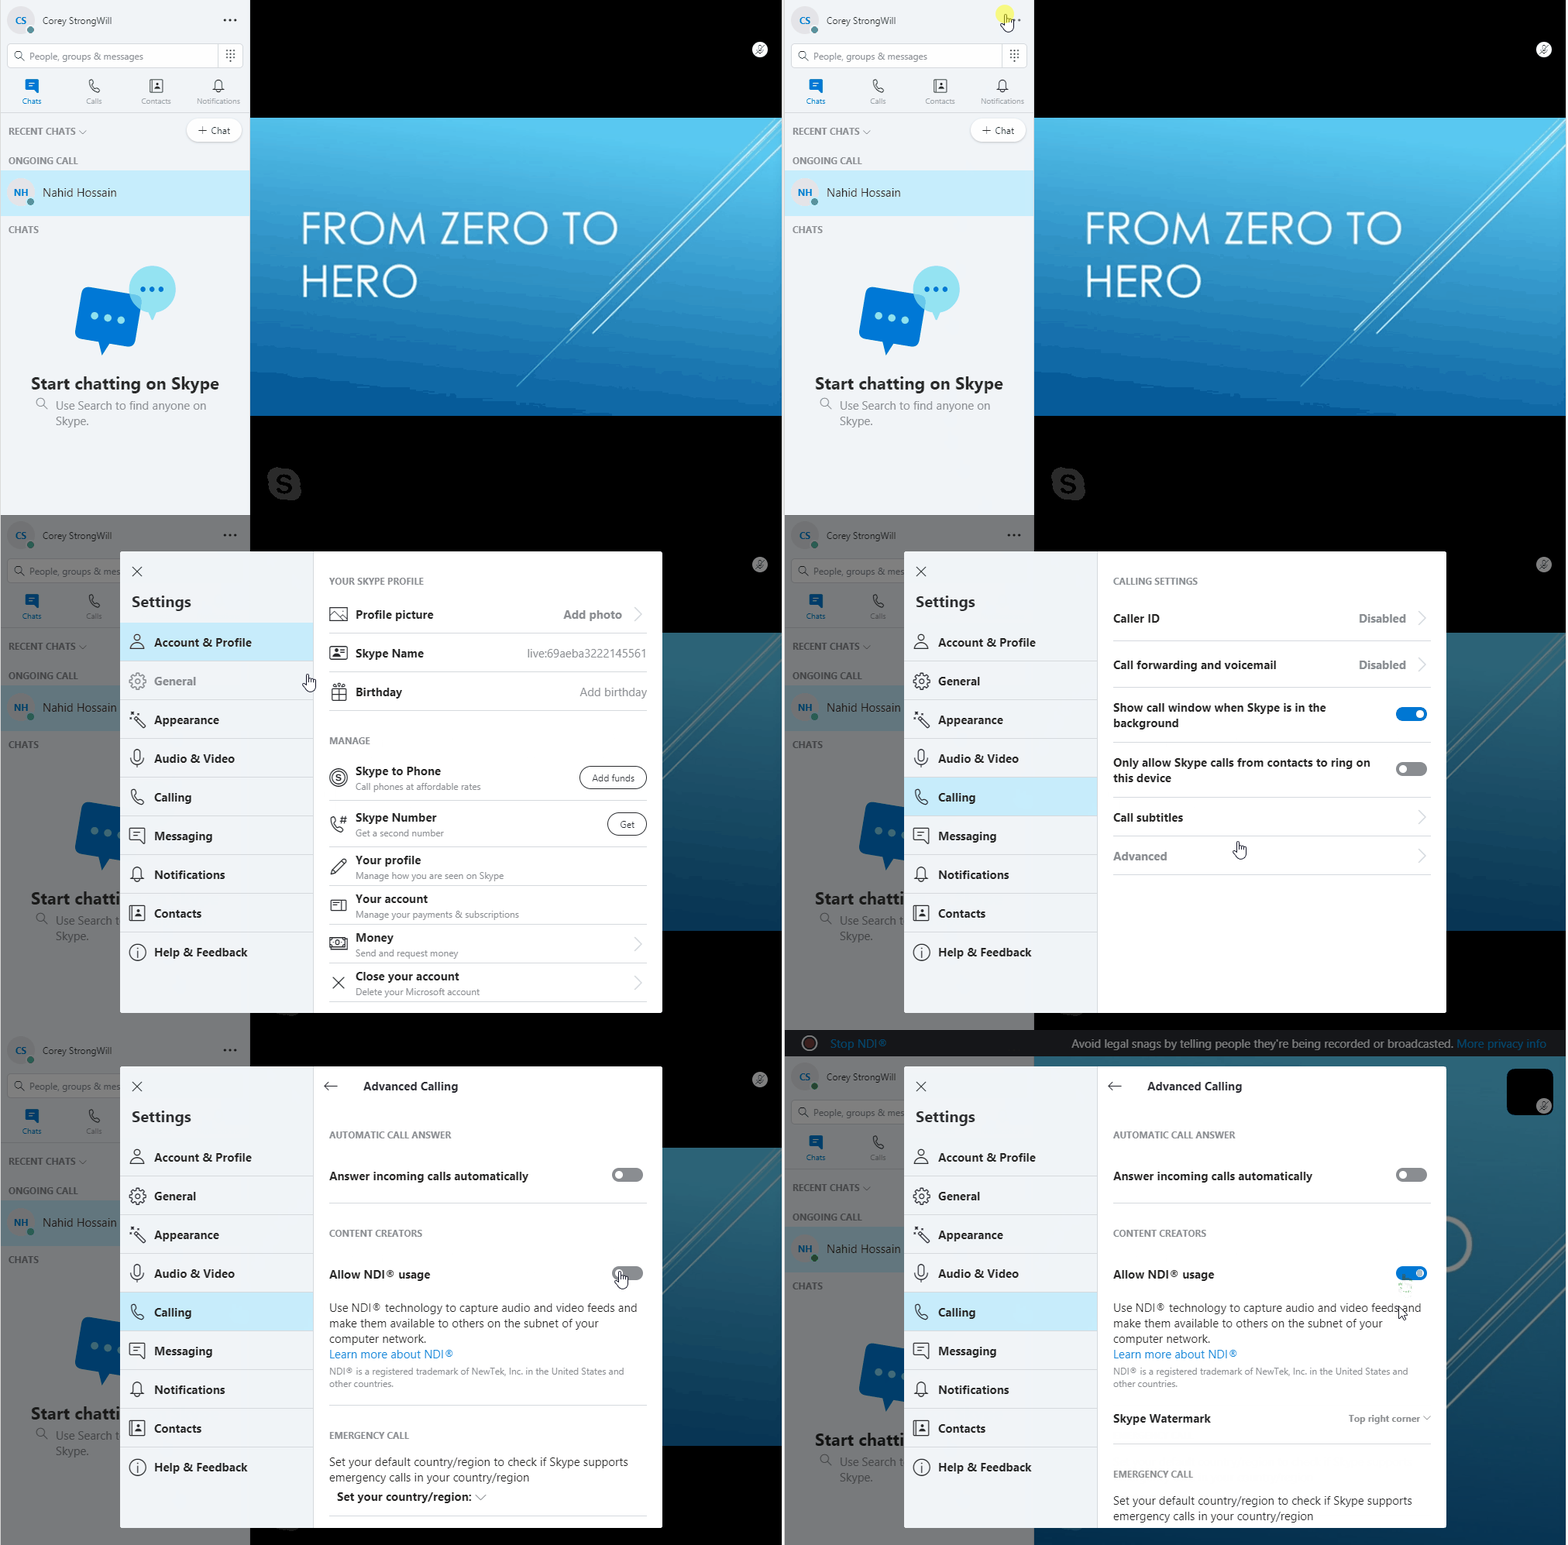
- Open the Microsoft Teams desktop app.
- Select Settings and more, then Settings.
- Open App permissions.
- Under Production tools, select Download Link and install the NDI binaries.
- Turn on the Production tools option.
You may need to repeat this process after a Teams update. Complete these steps before your webinar so you have time to troubleshoot if the NDI options are missing.
For additional details, see Microsoft's instructions for broadcasting audio and video from Teams with NDI.
Step 3: Start your Teams meeting
- Start or join your Microsoft Teams meeting.
- Ask each presenter to join the meeting.
- Confirm that every presenter can be seen and heard.
- In the meeting controls, select More actions.
- Select Streaming > Broadcast over NDI.
Teams will now make the available NDI feeds visible to OBS on your local network. Each presenter should have an individual video feed.
Step 4: Add each presenter to OBS
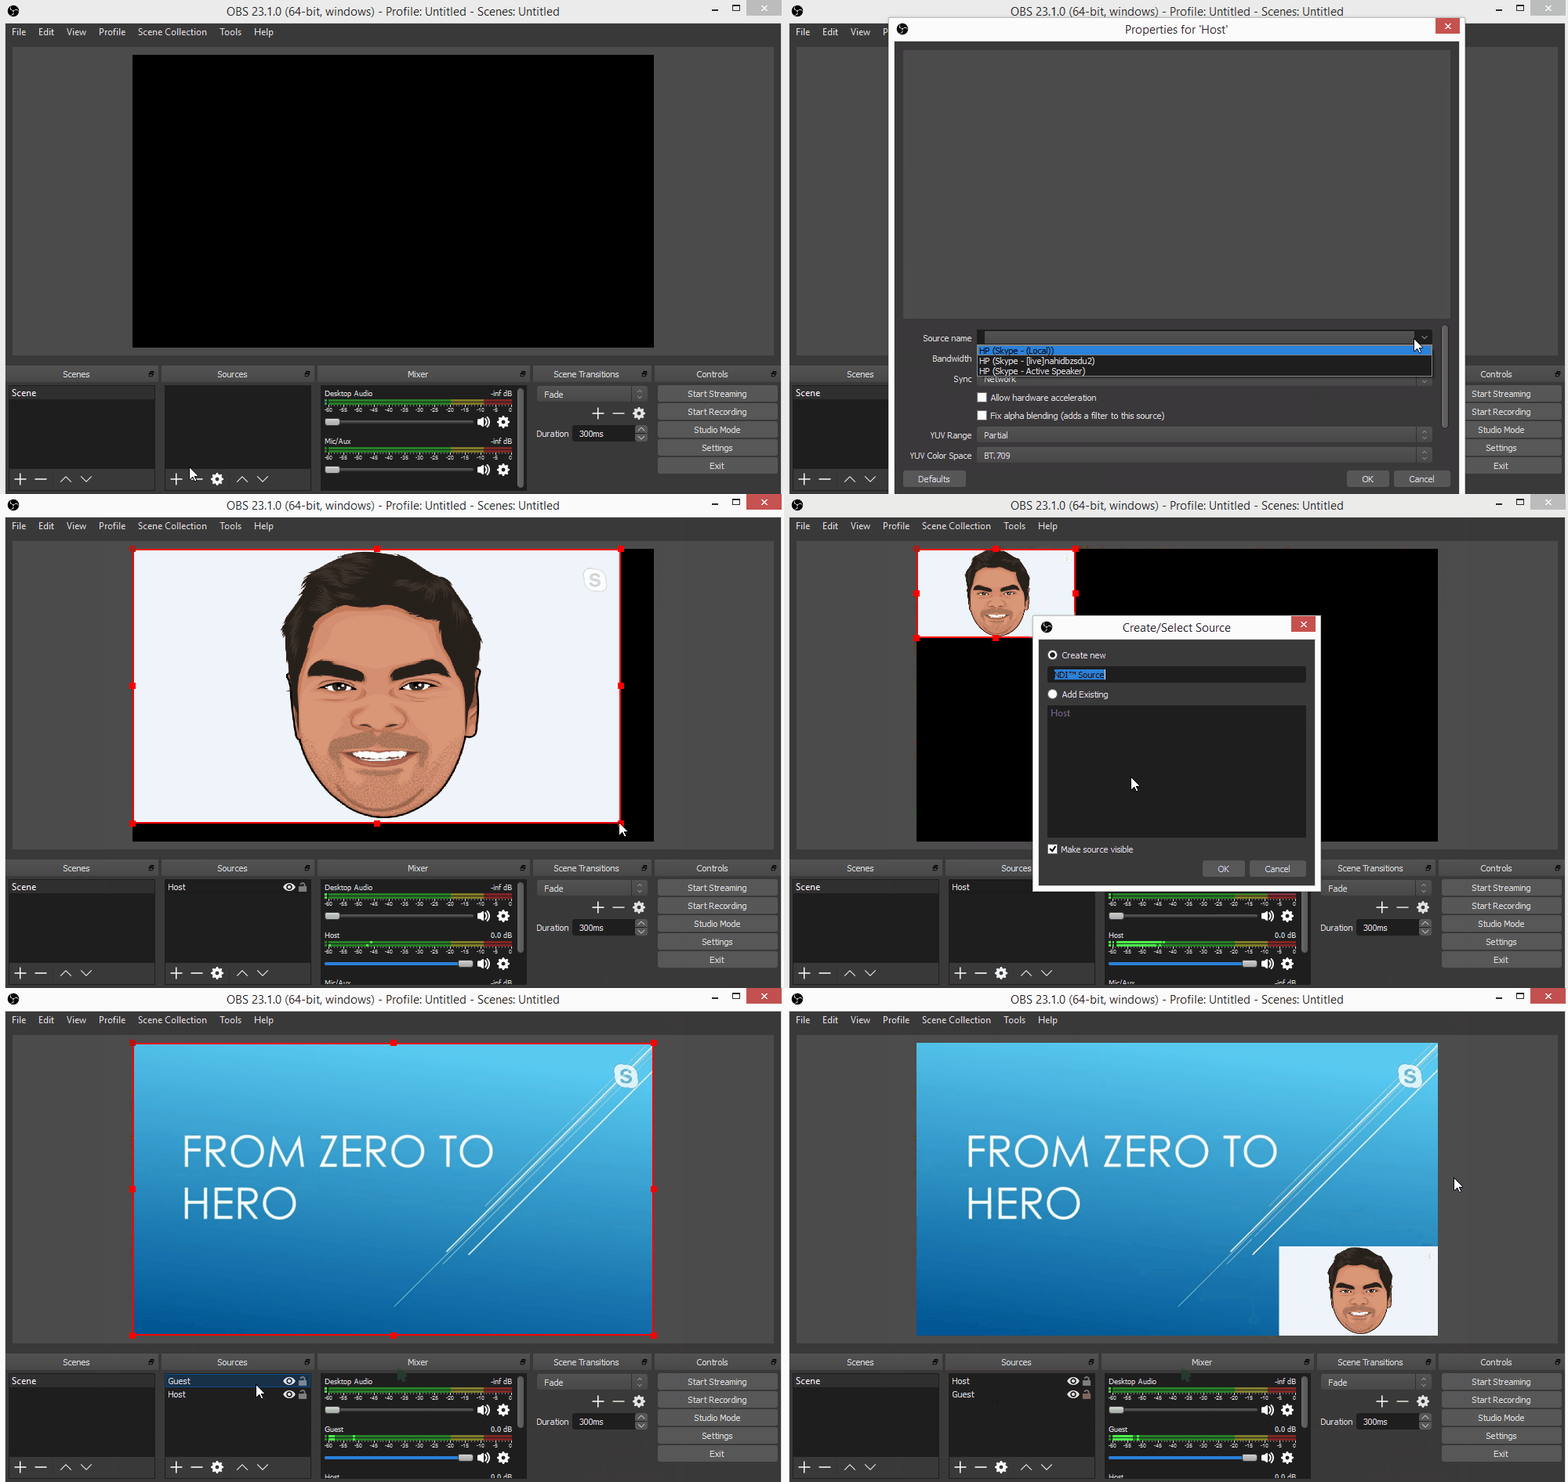
- Open OBS Studio.
- In the Sources panel, select +.
- Select NDI Source.
- Choose Create New and give the source a descriptive name, such as
Presenter 1. - In the Source name menu, select the NDI feed for that presenter.
- Select OK.
- Repeat these steps for every presenter you want to display separately.
Source names can vary depending on your Teams and DistroAV versions. Choose the source that matches the presenter you want to add.
The current DistroAV workflow is documented in the NDI guide for OBS.
Step 5: Create your presenter layout
After adding the presenters:
- Select each source in the Sources panel.
- Drag the source in the preview window to position it.
- Drag the corners to resize it.
- Add additional sources, such as:
- Slides
- Screen shares
- Logos
- Images
- Camera feeds
- Text overlays
- Use the up and down arrows in the Sources panel to control which sources appear in front of others.
You can create multiple OBS scenes for different parts of your webinar, such as:
- Two presenters side by side
- One presenter with slides
- Full-screen screen sharing
- Audience question and answer layout
- Closing or waiting screen
Step 6: Configure audio carefully
In the OBS Audio Mixer:
- Confirm that audio is moving for the active meeting source.
- Keep only one NDI source's meeting audio active.
- Mute duplicate NDI audio sources to prevent echoes.
- Add your local microphone separately if needed.
- Use headphones instead of speakers whenever possible.
Teams sends the incoming meeting audio as a mix that is shared across the individual NDI presenter feeds. Leaving multiple NDI sources unmuted can therefore cause the same audio to be added more than once.
Before going live, record a short test in OBS and listen for echo, feedback, or duplicated audio.
Step 7: Start your StealthSeminar webinar
Once your OBS scenes and presenters are ready, follow the appropriate StealthSeminar streaming guide:
- How to run a live webinar using OBS and YouTube Live
- How to run a live webinar using Twitch and StealthSeminar
Start OBS streaming first, confirm that the stream preview is working, and then enter the stream URL in the StealthSeminar Live Console.
If the NDI source does not appear in OBS
Try the following:
- Confirm that OBS was installed before DistroAV.
- Remove any older OBS-NDI installation before installing DistroAV.
- Restart OBS after installing DistroAV.
- Restart the computer if the NDI Source option is still missing.
- Confirm that the latest NDI Runtime is installed.
- Make sure Teams production tools are enabled.
- Confirm that Broadcast over NDI is active in the Teams meeting.
- Check that your firewall is not blocking NDI traffic.
- Confirm that the Teams and OBS computers are connected to the same local network.
- Test whether the source appears in an NDI monitoring application before troubleshooting OBS.
If the NDI options are not available in Teams, your account or meeting policy may not have permission to use broadcast production.
Alternative: capture the Teams meeting window
If NDI is not available, you can capture the Teams meeting directly in OBS:
- Open the Teams meeting and arrange the presenters in the desired layout.
- In OBS, select + in the Sources panel.
- Select Window Capture.
- Choose the Microsoft Teams window.
- Resize and position the captured window in your scene.
Window Capture is easier to set up, but it captures the Teams layout as one combined source. You will not be able to position each presenter independently in OBS.
Final checklist
Before starting your webinar, confirm that:
- Every presenter is visible and audible.
- The correct NDI source is assigned to each presenter.
- Only one meeting audio source is active.
- No echo or feedback is present.
- Your OBS scenes are arranged correctly.
- Your stream preview is working.
- Your StealthSeminar Live Console is configured before the webinar start time.