
How to Upload Personalized Pictures
StealthSeminar lets you display personalized images in webinar emails and other areas of your webinar.
To add an image, you need a publicly accessible image URL. You can use an image hosted in Google Drive, Dropbox, or on your own website.
Important: Use the direct URL to the image file, not the URL of a webpage, preview screen, or file-sharing page. Test the link in a private browser window to confirm that it opens without requiring a login.
How to add a personalized image
- Open the webinar where you want to use the image.
- Go to Customize.
- Locate the section where you want to add the image. In this example, we’ll use the Registration Confirmation email.
- Click Configure.
- Select Personalized Image.
- Enter the image URL using one of the methods below.
- Click Add.
- Review the image preview and save the section if a Save button is displayed.

Option 1: Use an image from Google Drive
- Upload the image to Google Drive.
- Open the uploaded image.
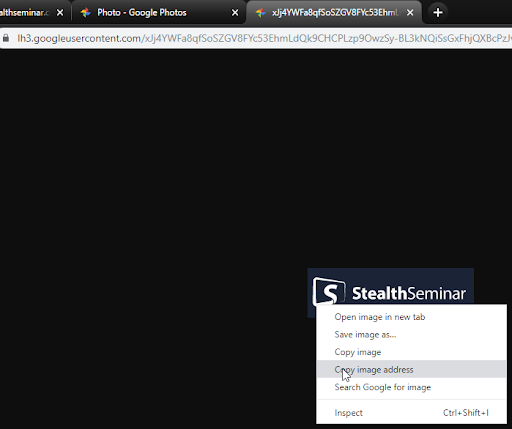
- Open the image in a new browser tab.
- In the new tab, right-click the image.
- Select Copy image address.
-
Return to the Personalized Image window in Stealth Seminar.
- Paste the image address into the image URL field.
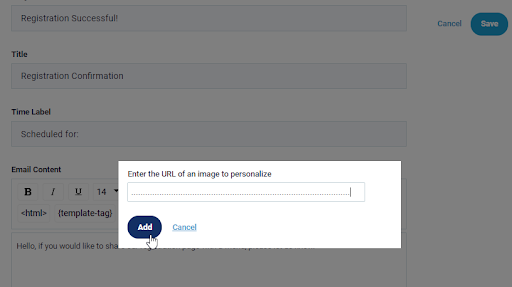
- Click Add.
Make sure the image is shared publicly or is otherwise accessible to Stealth Seminar. If the link opens a Google login page, update the file’s sharing permissions and try again.
Option 2: Use an image from Dropbox
- Upload the image to Dropbox.
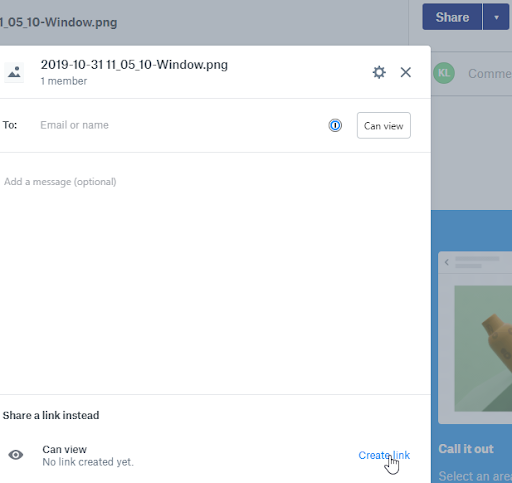
- Locate the image and click Share.
- Click Create link, if required.
- Click Copy link.
- Update the copied link so it points directly to the image file.
For most Dropbox links, replace the domain:
https://www.dropbox.com/
with:
https://dl.dropboxusercontent.com/
Keep the rest of the URL unchanged. For example:
https://www.dropbox.com/s/example/image.jpg?dl=0
becomes:
https://dl.dropboxusercontent.com/s/example/image.jpg?dl=1
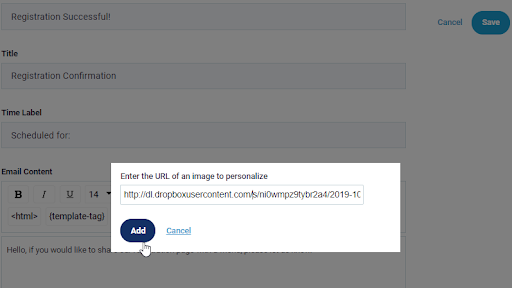
- Return to the Personalized Image window in Stealth Seminar.
- Paste the updated URL into the image URL field.
- Click Add.
Troubleshooting
If the image does not load, check the following:
- The URL opens without requiring a login.
- The URL displays the image itself, rather than a Google Drive, Dropbox, or website preview page.
- You copied the image address, not the address of the page containing the image.
- The link begins with
https://. - The image has not been moved, renamed, or deleted.
- The URL does not contain extra spaces or missing characters.
- The image is still publicly accessible when opened in a private browser window.
If the image continues to fail, try hosting it on your website or another service that provides a direct public image URL.